
This lesson is made with PSPX9
But is good with other versions.
© by SvC-Design

Materialen Download :
Here
******************************************************************
Materials:
cadre-nkt.png
femme-nkt.png
fleurs-nkt.png
fond-nkt.jpg
forme-nkt.png
fruits_nkt.png
lettres-nkt.png
papillon-nkt.png
paysage-nkt.png
Preset_UserDefinedFilter_Emboss_5.PspScript
snippet-nkt.png
spirale-nkt.png
******************************************************************
Plugin:
no
******************************************************************
color palette
:
no
******************************************************************
methode
When using other tubes and colors, the mixing mode and / or layer coverage may differ
******************************************************************
General Preparations:
First install your filters for your PSP!
Masks: Save to your mask folder in PSP, unless noted otherwise
Texture & Pattern: Save to your Texture Folder in PSP
Selections: Save to your folder Selections in PSP
Open your tubes in PSP
******************************************************************
We will start - Have fun!
Remember to save your work on a regular basis
******************************************************************
We start:
Open the tubes provided in your PSP and duplicate them and erase the pads.
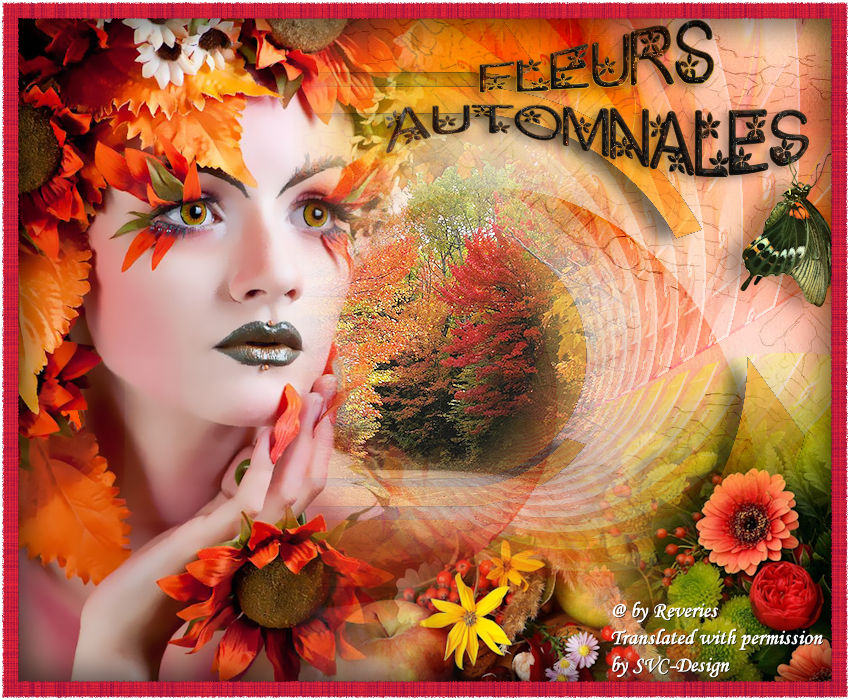
1.
Open a new image de850 x 700 pixels, transparent.
Selection - Select All
Open fond-nkt
Edit – Copy
Edit - Paste into selection
Selection - Select None
2.
Open snippet-nkt.png
Edit – Copy
Edit - Paste as new layer
Blendmode:
You must have this:
3.
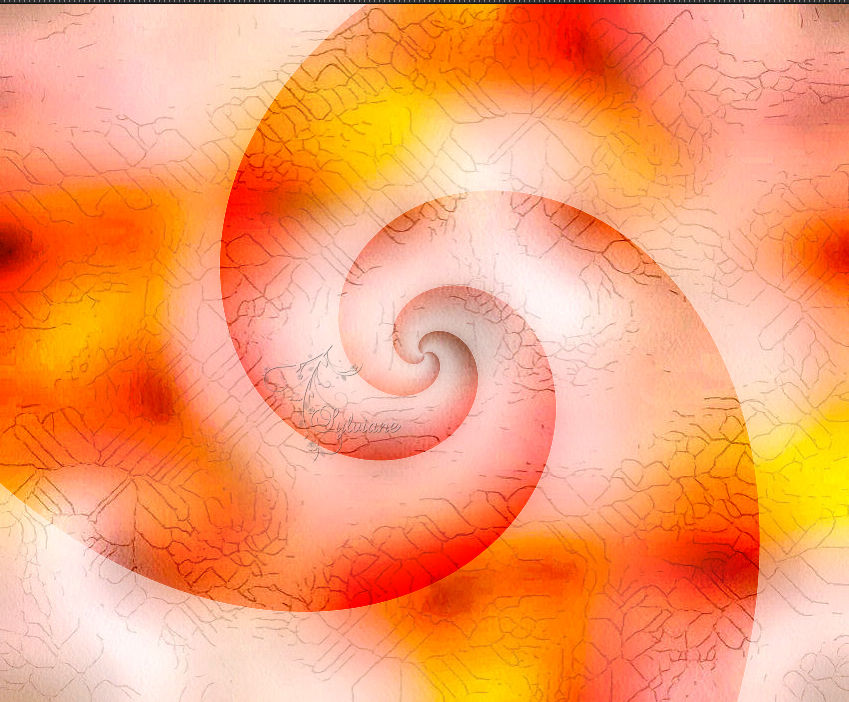
Open spirale-nkt.png
Edit – Copy
Edit - Paste as new layer
Objects – align – Right
Blend Mode: soft light
4.
Effects – User Defined Filter – Emboss 5
5.
Open forme-nkt
Edit – Copy
Edit - Paste as new layer
Deco stands right
Blend Mode: Multiply
Effects - 3D effects - Drop shadow
2/-18/30/20 color: #000000
6.
Open paysage-nkt
Edit – Copy
Edit - Paste as new layer
Deco stands right
Image - Resize – 85%
Adjust - Sharpness – Sharpen
The work now looks like this
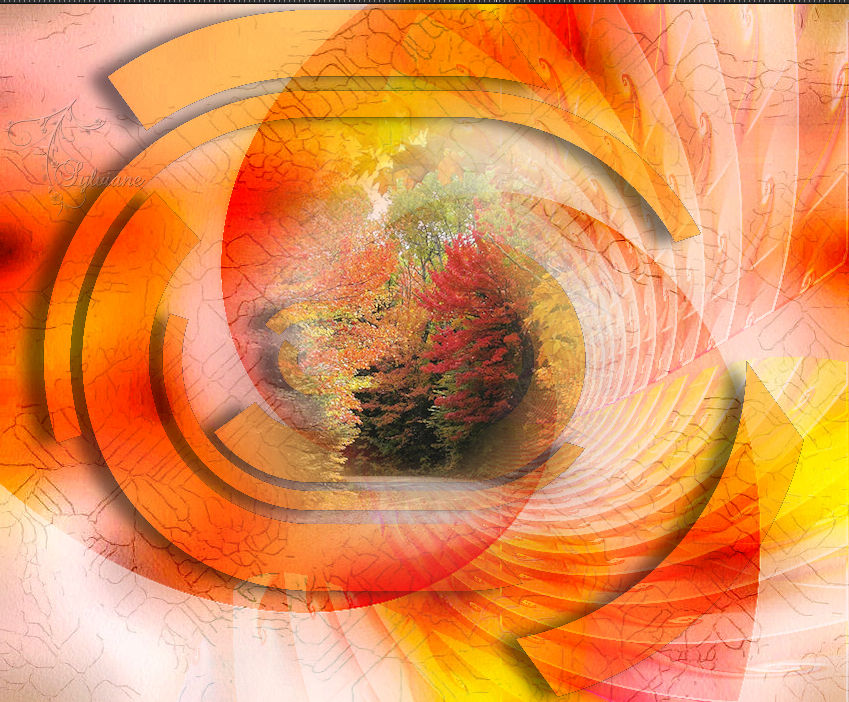
Adjust - Sharpness – Sharpen
7)
Open femme-nkt
Edit – Copy
Edit - Paste as new layer
place it on the left.
Open fleurs-nkt
Edit – Copy
Edit - Paste as new layer
place it down on the right.
Image - Resize – 85%.
8.
Open fruits_nkt
Edit – Copy
Edit - Paste as new layer
Place it down next to the flower tube.
Resize to 85%
and mix with the other tube.
9.
Open lettres-nkt
Edit – Copy
Edit - Paste as new layer
Place the text upwards and slightly to the right
or create your own text with the supplied font
10.
Open papillon-nkt
Edit – Copy
Edit - Paste as new layer
Image - Mirror - Flip Horizontal
Image, resize to 40%
and place it on the letter S of the word fall.
Effects - 3D effects - Drop shadow
2/-18/30/20 color:#000000
11.
Open cadre-nkt
Edit – Copy
Edit - Paste as new layer
Cadre stands right
Effects - 3D effects - Drop shadow
0/0/100/50 color:#000000
12.
Put your watermerk
Layers – Merge – Merge All ( flatten)
Save as JPEG
Back
Copyright Translation © 2018 by SvC-Design
